
Have you ever thought about how you tune your guitar? Ever sat down, flicked on the tuner, got that little green light lit up on each string, only to hit your first chord and thought “well, that ain’t right” and then put it down to it being in your mind. After all, that piece of equipment is built for this purpose. Of course it’s right… right? This is how I used to tune, whether it be for practice, during a gig or in a recording. But there’s a better way to go about it. In my years in recording, I’ve picked up a bit of knowledge about getting the tuning right on a recording and I’m going to share the basics with you here.
Everything isn’t as it seems
When you pluck a guitar string, hit a note on a piano, hit a drum or play any instrument that is percussive in nature, the pitch of the note you’re hitting doesn’t stay consistent throughout the course of the note. This has to do with the physics of how sound is made: you have a certain length of string at a certain thickness that’s tuned to a certain tension and those 3 factors give you your strings resonant frequency when struck.
The difference comes when you actually hit the string, the distance the string moves up and down at the start of the note is more than what it is at the end. This added movement means that the string has more tension at the start and therefore the note will be higher at the start and then drop down over the duration of the note. You’ll notice this in an extreme sense if you plug into a quick, accurate tuner and hit a note nice and hard, the note might start sharp and then go flat.
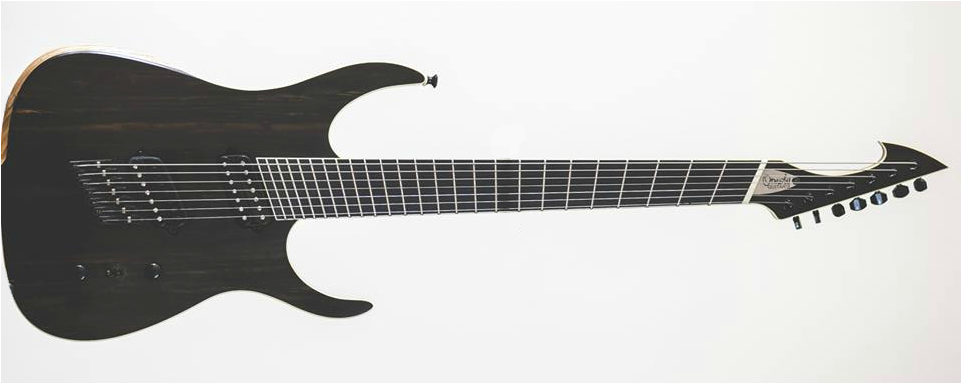
 String Gauge and Scale Length
Different instruments, different string thicknesses, age of strings, instrument scale length, how hard you pick, pick thickness, using fingers: these all have an effect on how drastic your change in pitch is. This isn’t something that you can get rid of (it’s physics) but it is something you can tame. In general, more tension equals less pitch drop. Thicker strings and longer scale length means more tension. This doesn’t mean that you should go out and put the thickest strings that you can find, because there’s no use having a perfectly in-tune guitar if you can’t play the damn thing. It is, however, something that’s worth experimenting with, and if you use any kind of dropped tuning, you’ll find your tones and tuning getting better more quickly.
On my electric guitars, I tend to tune down the guitar half a step to Eb, and some songs I drop the low E down to Db. I’ve been experimenting with string thicknesses for a while and have been slowly getting thicker and thicker strings until I was happy with the tone and felt that going any thicker may affect my playing.
Right now I’m using Ernie Ball 11-54 guage, which is pretty thick but I think sounds great. I use these on both my PRS SC-245 and Gibson BFG which have scale lengths of 24.5” and 24.75” respectively. These are quite short in comparison to most Fenders and Ibanezes which have a 25.5” scale length. So you’d find that putting strings that thick on a guitar with a longer scale length might make it a bit hard to play, but it’s worth experimenting with.
Stevie Ray Vaughan was famous for using strings that were 13-58 gauge on his Strat, which is ridiculously thick but I’m sure his tuning was accurate and obviously his tone was great. If you are thinking about changing your string gauge, just remember that other things will change on your guitar that may need compensating for. Mostly your intonation, string height and truss rod. You may need to also look at your nut and bridge slots, sometimes it’s better to get a luthier to do it.
 |
| This is an Ormsby Multiscale Guitar |
If you’re looking at buying a new guitar, scale length is something that you will definitely want to consider. If you’re planning on tuning down a bit, you will probably want something with a 25.5 or similar scale length. If you’re planning on tuning down to B, or even A then you might want to consider a baritone (27”) scale length. If you really want to get into it, you can look at Multi-scale guitars, which have different scale lengths between the strings and fanned frets.
How Do You Play?
As mentioned before, playing harder means there’s more raise in pitch at the start of the note, which means that there’s more drop in pitch throughout the duration. This means, the softer you hit, the more consistent your string pitch will be. Of course, hitting softer is going to change the vibe of your sound and may not get enough aggression and feel into your sound. It’s good practice to find a balance between the two. When you’re playing a part, record it a few times playing at different intensities. You’ll probably find that you can play quite a bit softer than what you are right now and it will sound a lot better in the context of the other instruments in the song, while still having enough attack and aggression.
Using a different pick will also change the amount of pitch drop that you get from each note. A thinner, softer pick will cause less string displacement, where a thicker one will give a harder hit, but again, this can affect the tone that you like. Experimenting with pick material is also very beneficial as it will alter what tone you get out the other end. Finally, the pointiness of the end will make a difference to the sound, as long as you compensate with your playing as you’ll find that you don’t have to dig in so much.
Finally it’s worth realising how you play and tuning to that. If you play more consistent, fast and hard picking parts, and you tune to the sustain of your note, you’re going to find that you’ll be sharp most of the time. If you have softer, held out notes, and you tune to a hard pick, then you’ll be flat. This is mostly for live scenario, but when you tune, tune to how you mostly play in your band because you can’t change how a string changes pitch, but you can take steps to try to be in tune the majority of the time. It’s worth mentioning that everyone in the band should also use this approach, because you can be as in tune as you want, but if the rest of the band is sharp, then you’re flat.
 |
| Note: Not what I really mean |
Tune With Your Ear and Tune Your Ear
Most of the time, in a live situation, we don’t have the time to sit down and critically listen to our tuning, unless you want to create a very boring and awkward situation for your audience. In the studio, however, we have all the time in the world to get our tuning nice and perfect, and this will result in better sounding recordings. This technique means tuning your guitar to each part as you record it. An accurate tuner is great at telling you exactly what frequency your string is resonating at, but they don’t know the song you’re playing to and can’t tell you what sounds good.
The best way to tune your guitar to make it sound good for the part, is to make it sound good from the start. To do this, you have to use your ears and listen carefully to how your instrument relates to the rest of the song.
1. Use your tuner to get your guitar into the ballpark of where it should be
2. Hit play on the track that you’re recording to3. Play the root note (or most common note) of the part.4. Listen. Does it sound right? could it be more in tune.5. Adjust tuning. Repeat
This is probably best practice if you can loop a section that you’re recording and spend some time tuning to it. Some parts will be easier to tune to than others, as they’ll have open strings as the main notes, or just a couple of notes in the part, but practice will make you better and quicker at this and you’ll find it easier every time you do it. You’ll also find your parts sounding much better in the mix.
Tuning A Guitar To Itself - An Eye Opener
When I used to tune my guitar, I’d use a tuner, or I’d do the old 5th fret tuning trick and work my way up the strings, getting the tones right with each other. I also used the harmonic tuning trick - the 5th fret harmonic on the low E is the same as the 7th fret harmonic on the A. Same with the next few strings up until you hit the B where you have to go back to normal tuning technique. Both of these work in getting the strings technically in tune with each other, but I found that chords sometimes had a string or two sounding a little out.
This is why I changed my way of tuning. Instead of starting on the low E and working my way up, trying to get fretted or harmonic pitches to sound the same, I started on the G string. I used my keyboard or an App I got called “pitch pipe” and tuned the G to that by ear so that it sounded right. Then I hit the G and the B together and played with the tuning of the B until they sounded right together. This may take a bit of small movements to get it to where you want it. Then hit the G, B and high E together and tuned the high E until it made a nice sounding Em chord. Then I brought in the low E and tuned that until it sounded right with the top 3 strings. I then changed the chord and played the D, G and B together to make a G chord and tuned the D. Finally, I played the A and the high E together to tune the A string.
This technique might sound a bit strange and all over the place, but essentially I was tuning to open chords in order to make my open chords sound in tune. If you can make your strings work with each other in a way that sounds right in the tuning stage, they’ll sound right when you start playing a song. On the other hand, if you tune individual strings using harmonics, the harmonics will sound right, but they chords might be a bit off. So give this technique a try and see how it sounds for you. You might find it harder to tune two different pitches together at first, but practice it and it will get a lot easier in time and you’ll have a better ear as a bonus.
I hope you guys found this helpful and not too confusing. If you have any questions about the ideas and techniques that I’ve discussed here, feel free to comment and I’ll try to clarify as best I can. Until next time, happy playing… in tune.
-Locky
No comments:
Post a Comment